This is the draft website for Programming Historian lessons under review. Do not link to these pages.
For the published site, go to https://programminghistorian.org
Contents
- Introduction
- Lesson Goals
- Papua New Guinea Pottery
- Ethics
- Software Requirements and Installation
- Creating a Interactive 3D Scene
- Designing a Game
- Adding Additional Jars
- Conclusion and Next Steps
- References
Introduction
This guide shows how to use the three.js javaScript library to create a website with 3D models to illustrate the diversity of the pottery technologies of communities in the Papua New Guinea (PNG) area. Selecting a vessel model reveals information on the community and their ceramics. The website also can be the basis for a matching puzzle where the vessel is matched to the community. In the puzzle version selecting a torus shows the information about the pottery and if the vessel is dragged onto the correct torus the background colour will change.
Web models and digital games can help the dissemination of archaeological information. As opposed to simply writing texts about artifacts, supplying communities with more accurate examples of the archaeological past can be considered a goal of archaeologists (Holtorf, 2005). This lesson aims to facilitate the production of engaging digital research outputs by introducing three.js as a tool to do this. The use of interactive 3D models in websites enables examples of archaeological and historical material culture to be presented more effectively.
There are several different ways for creators to make websites that include 3D models. Many cultural heritage models are hosted on SketchFab (Maschner, 2022), which allows for interactive annotations. For more complex interactions with models, game engines such as Godot, Unity and Unreal Engine can be used. However websites can also be made relatively easily using the three.js JavaScript library. This guide provides an example of making such a website. While this tutorial uses three.js, many of the concepts are relevant to game engines and 3D modelling software.
Cross community comparisons of different aspects of material culture, such as pottery, can indicate shared community histories. These aspects include both appearance (form and decoration) and methods of production. This concept is sometimes termed ‘cultural evolution’ (O’Brien et al. 2008). However, the spread of ideas and local innovations generally occur at a faster rate in material culture than with genetics or linguistics and the transmission of pottery production is argued to have occurred, at least partially, independently of demic diffusion in Europe (Dolbunova et al. 2023). Comparisons of pottery across a region such as PNG, or the wider Pacific, reflects shared heritages, community contacts and local innovations. Visualising the pottery forms and their geographic distribution helps illustrate this, especially when additional information, such as the language family, of the community is considered. The extensive ethnographical work of researchers, such as May and Tuckson (2000) and Pétrequin and Pétrequin (2006) has been essential for such comparisons.
Lesson Goals
The primary goal of this tutorial is to use the three.js library to create a webpage featuring a 3D scene with selectable components. Scene creation will involve adding lights, cameras, primitive and complex models, and controls. The models will get materials and/or image textures. Concepts such as model groups, scale and visibility, and 3D co-ordinates will be introduced.
Turning websites with models into puzzles makes them more interesting. An additional goal, is to make the models moveable and positioned at random places. A test is introduced after each time a model is moved, to see if it has been placed in the correct position and successful matches trigger a background colour change.
Papua New Guinea Pottery
While not ubiquitous throughout PNG and West Papua, many communities have a history of making ceramic vessels for use in cooking, storage or ceremonial purposes. Pottery was first introduced to the Papua mainland over 3000 years ago (Gaffney et al. 2015) and the many different techniques, forms and decorations found are probably the result of a combination of local innovations and influences from different external sources.
In trying to understand this cultural transmission researchers compare factors such as decoration, form and building technique among the different communities. This lesson includes information and models for 29 communities. Step-by-step instructions are given for 6 models, with the assets and information for another 23 provided for users to practice with. These vessels include the paddle and anvil-made, rounder, less decorated vessels, often used for water storage and generally made by women, in coastal communities (including Bilibil speakers), scattered around the island. In the south east, woman potting communities (including Mailu and Misima-Paneati speakers) utilise different variations of techniques incorporating finishing with clay rings and generally geometric incised or applique decoration. While in many inland communities, men and women potters (including Adzera, Dimiri and Iatmul speakers) use spiral (or ring) building with decorations that can include sculptural elements and carvings.
Ethics
It is important to reference the source of images and models used in a page. Here this will be done on an information panel in the site. The use of cultural heritage models, especially from communities that have been exploited and have had objects taken without consent, needs to be carefully considered. Laws and guidelines differ from country to country. Ideally informed consent from the maker community, or their descendants should be obtained for modelling of cultural objects and in some countries intellectual property legislation may require evidence that at least several attempts have been made to obtain permission.
While “utilitarian” items are generally considered exempt from copyright, some ceramics have ceremonial purposes and in some areas decoration can be based on hereditary ‘trademarks’. The models used in this project, were created with Computer Aided Design (CAD) by the authors (who are not of PNG heritage) and are intended to be symbolic rather than realistic. While simplification of some of the designs results in the brilliance of some of the potteries being under-represented, it aids in avoiding impingement on the moral rights of the original communities. Objects (particularly human remains or funerary artifacts) can also have different values and associations for different people and cultures as highlighted by recent (2024) legislation in the USA on the display of certain Native American objects (including burial pottery). Interactive web models provide a way to effectively communicate academic research to a broader community, ultimately community involvement and control should occur at an earlier stage of the study, but as in other fields technological advances have occurred that could not be forseen by data/artefact collectors, and ideas around what constitutes ‘informed consent’ have also advanced. Including information, such as Traditional Knowledge (TK) Labels in model metadata is one way cultural information can be connected to a model. How different communities feel about their cultural objects being modelled and represented on websites is an area that would benefit from further research.
The degree to which models of cultural artefacts are covered by copyright, and who that copyright belongs to, depends on several factors, and is not always clearcut (Oruç, 2020; D’Andrea et al. 2022). Many researchers aim to make their models and site code available for others to use to increase the dissemination of information and promote further research and often models/code are given Creative Commons licences such as CC-BY-NC. However, it is always worth considering that your models may be used in scenes you disagree with or find offensive, i.e. the pot models could be used in a potentially culturally derogatory manner (illustrating cannibalism). While you can request users to only use the models and code for non-derogatory purposes, models and code are increasingly being scraped by Artificial Intelligence (AI) ‘bots’ thus potentially contributing to models used in scenarios you did not forsee. The use of the “NoAI” HTML meta tag may help discourage this.
It is also important to reflect on whether scenes or especially puzzles, are contributing to a colonial approach. For example it might be better to have objects returned to their place of origin, than a puzzle that features them being stolen or ‘collected’.
Software Requirements and Installation
- Text editor (Visual Studio Code (VSC) recommended).
VSC can be downloaded from https://visualstudio.microsoft.com, it is free and runs on Windows, macOS, and Linux. It also features a terminal. Install as per website instructions.
- Terminal (ie Windows PowerShell, or the terminal in macOS or Linux), or the terminal in VSC.
Some simple command line typing will be required. Most importantly you need to be able to move to the folder that your website file will be in. If you use the VSC terminal, this should be automatic.
- Web browser. Chrome, Safari, Edge etc.
Chrome generally has the better developer tools for code debugging.
- Node.js is a free JavaScript tool.
It is easy to install (Windows, macOS, and Linux). This will allow you to ‘serve’ code internally to your browser (using an address in the browser such as http://localhost:3000), and see if the code is working, or how code changes affect your site. Node.js is probably the easiest way to serve code internally. Install as per website instructions, and check it is working in your terminal by typing
node -v
and confirming that you get a version number and not an error message.
- A GitHub page (recommended if deploying).
To deploy your page so that everybody can access it, you can use GitHub. You get one free page per account, ie my page at https://github.com/tosca-har/tosca-har.github.io, results in a website at https://tosca-har.github.io/. Alternatively you can deploy your site using a free service such as Vercel.
- The three.js library.
There are 2 ways to use the three.js JavaScript library. This tutorial will use the library via a content delivery network (CDN). Basically, code at the top of JavaScript script will fetch and import the library from a server. This removes the need for you to work with build tools like Vite, which you would have to do if you download the actual three.js code. Downloading, working and building the code is more robust long term but for this lesson the CDN approach is fine. This code will use three.js version 0.160.0, although it has been tested and works with later versions such as 0.166.1. If you want to change the version used you need to change both numbers in the import maps, i.e. use three@0.166.1 instead of three@0.160.0, and also change the version later on when importing the draco file compression loader. Do not mix versions. This lesson does not contain code likely to be affected by version changes but three.js versions are not necessarily backward compatible so it is possible that problems will occur if later versions are used. Browser updates also occasionally cause incompatibility problems.
Creating a Interactive 3D Scene
Now you need to set up the initial directories and files for the project. Make a new folder - call it myscene.
In VSC open the folder.
Create a file and call it index.html
Note that it must be called this.
We are going to put all the code in this file, this is not the best practice but the point of the lesson is to learn about three.js.
In the index.html file, copy and paste the following:
<!DOCTYPE html>
<html lang="en">
	<head>
		<title>PNG pottery</title>
		<meta charset="utf-8">
		<meta name="viewport" content="width=device-width, initial-scale=1.0, user-scalable=no">
		<link type="text/css" rel="stylesheet" href="main.css">
		<script type="importmap">
            {
              "imports": {
                "three": "https://unpkg.com/three@0.160.0/build/three.module.js",
                "three/addons/": "https://unpkg.com/three@0.160.0/examples/jsm/"
              }
            }
        </script>
	</head>
	<body>

		<div id="info">
			<a href="https://threejs.org" target="_blank" rel="noopener">three.js</a> The Jars of Papua
		</div>

		<script type="module">
			import * as THREE from 'three';
		</script>
	</body>
</html>
Save the file. This html file is: creating a basic page with a link to the three.js site and a title; importing the three.js library and addons; and linking to a style sheet (which we will create next). The link with the anchor tags (i.e. <a> </a>) is not needed for three.js to work and is there because this page was developed from the three.js example pages, you could remove it or change it to link to any site you want. Anything written within the script tags (i.e. <script> </script>) will be in the JavaScript language. In JavaScript code, comments are marked by ‘//’ and anything on that line after that will be ignored.
In the myscene directory create another new file called ‘main.css’ and paste in the following.
body {
	margin: 0;
	background-color: #000;
	color: #fff;
	font-family: Monospace;
	font-size: 13px;
	line-height: 24px;
	overscroll-behavior: none;
}

a {
	color: #ff0;
	text-decoration: none;
}

a:hover {
	text-decoration: underline;
}

button {
	cursor: pointer;
	text-transform: uppercase;
}

#info {
	position: absolute;
	top: 0px;
	width: 100%;
	padding: 10px;
	box-sizing: border-box;
	text-align: center;
	-moz-user-select: none;
	-webkit-user-select: none;
	-ms-user-select: none;
	user-select: none;
	pointer-events: none;
	z-index: 1;
}

a, button, input, select {
	pointer-events: auto;
}

.lil-gui {
	z-index: 2 !important;
}

@media all and ( max-width: 640px ) {
	.lil-gui.root {
		right: auto;
		top: auto;
		max-height: 50%;
		max-width: 80%;
		bottom: 0;
		left: 0;
	}
}

#overlay {
	position: absolute;
	font-size: 16px;
	z-index: 2;
	top: 0;
	left: 0;
	width: 100%;
	height: 100%;
	display: flex;
	align-items: center;
	justify-content: center;
	flex-direction: column;
	background: rgba(0,0,0,0.7);
}

#overlay button {
		background: transparent;
		border: 0;
		border: 1px solid rgb(255, 255, 255);
		border-radius: 4px;
		color: #ffffff;
		padding: 12px 18px;
		text-transform: uppercase;
		cursor: pointer;
}

#notSupported {
	width: 50%;
	margin: auto;
	background-color: #f00;
	margin-top: 20px;
	padding: 10px;
}
This file came from the examples folder at three.js, it is a style file. Save the main.css file and then you can close it.
Make sure that the command line of your terminal/shell indicates that you are in the myscene folder (…myscene %). In VSC, Terminal > New Terminal will give you a terminal. In the terminal type
npx serve
this will serve your site, normally to port 3000, but check the message to see what local address is being used. Open a web browser and go to that address (ie http://localhost:3000) and if all is working you will see a black page with ‘three.js The Jars of Papua’.

Figure 1. Webpage with black background and small title.
To stop the server use Ctrl + C in the terminal. You can restart with ‘npx serve’, or use the keyboard up arrow to find previous terminal commands. You may need to reload the page in the browser to apply any code changes.
Creating the Basic Web Page
Every three.js website has a ‘scene’ to which cameras, lights and objects need to be added. First create a scene with a background colour and a camera. The position of the camera is important, sometimes you can not see your models because the camera is looking away from them or they are outside its field of view. We will use a perspective camera with parameters that define the field of view, including boundaries for culling objects that are too close or too far from the camera. The units for three.js are metres, and this camera will not render to the screen anything nearer to 0.1m and further than 10m. When we introduce moving the camera later, you will see objects disappear if they get too close.
The camera, and other positions are set in x, y and z order. Different graphics programs and game engines use different co-ordinate systems. In three.js x is left (-) and right (+), y is down (-) and up (+) and z is far (-) and near (+), i.e. it is a Y up, right-handed system. The camera is set at a height of 1.6m, and later the map will be at 0.8m, because this code was originally written for use in virtual reality. The z co-ordinate for the camera is set at 3m, as if you have stepped back from the scene.
This background will be peach (0xf7d382). To specify colours you can use the colour hex code after ‘0x’.
In the index.html file, after the import declare the variables (with let), call and define the init and other necessary functions. Variables are generally declared outside function definitions, but sometimes will be declared within a function definition if the variable is only referred to within the function definition.
After:
import * as THREE from 'three';
add:
	// Variables
	let container, camera, scene, renderer; // declare the variables

	// Function calls
    	init(); // this is calling the init function
	animate(); // this is calling the animate function

	// Function definitions
    	function init() { // within the braces we define the init function
		container = document.createElement( 'div' );
		document.body.appendChild( container );
        	scene = new THREE.Scene();
		scene.background = new THREE.Color( 0xf7d382 ); // use the hexcode of any colour you want.

		camera = new THREE.PerspectiveCamera( 50, window.innerWidth / window.innerHeight, 0.1, 10 ); //vertical field of view, aspect, near plane, far plane
		camera.position.set( 0, 1.6, 3 ); //x, y, z

        	renderer = new THREE.WebGLRenderer( { antialias: true } );
		renderer.setPixelRatio( window.devicePixelRatio );
		renderer.setSize( window.innerWidth, window.innerHeight );
        	container.appendChild( renderer.domElement );
       	 	window.addEventListener( 'resize', onWindowResize );
		}
	function onWindowResize() {
		camera.aspect = window.innerWidth / window.innerHeight;
		camera.updateProjectionMatrix();
		renderer.setSize( window.innerWidth, window.innerHeight );
	}

	function animate() {
		renderer.setAnimationLoop( render );
	}

	function render() {
		renderer.render( scene, camera );
	}
Reload the page after saving the index.html file and check that you have changed the background colour.
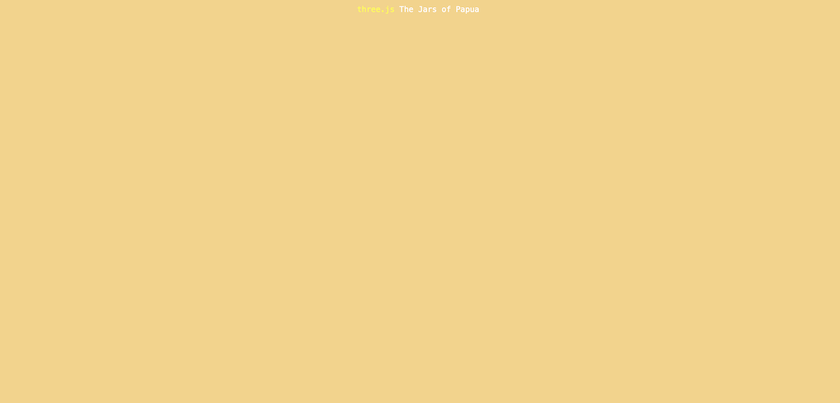
Figure 2. Webpage with peach background.
Next we need to add lights and something to see.
There are several different types of lights. We will add a hemisphere light and a directional light. The hemisphere light has 2 colours and an intensity (from 0 to 1), while the directional light has one colour and a position. Use the values supplied first and if everything is working later you can experiment with different values. You can add lights directly, like we do with the hemisphere light, or declare them, modify their parameters and then add them, like we do with the directional light.
In the function init() and after:
camera.position.set( 0, 1.6, 3 ); //x, y, z
add:
    	scene.add( new THREE.HemisphereLight( 0xffffbb, 0x080820, .5) ); //sky colour, ground colour, intensity
	const light = new THREE.DirectionalLight( 0xffffff ); // colour
	light.position.set( 1, 6, 2 ); // x, y, z
	scene.add( light );
Now we will add some coloured spheres. Three.js has several basic geometries, including spheres, tori (donuts), planes and boxes. You could group many of these together to make a model, and we will use 9 spheres and a plane to make a vessel colour key for how the jars were made.
All objects are made from meshes of nodes (points) joined with edges.
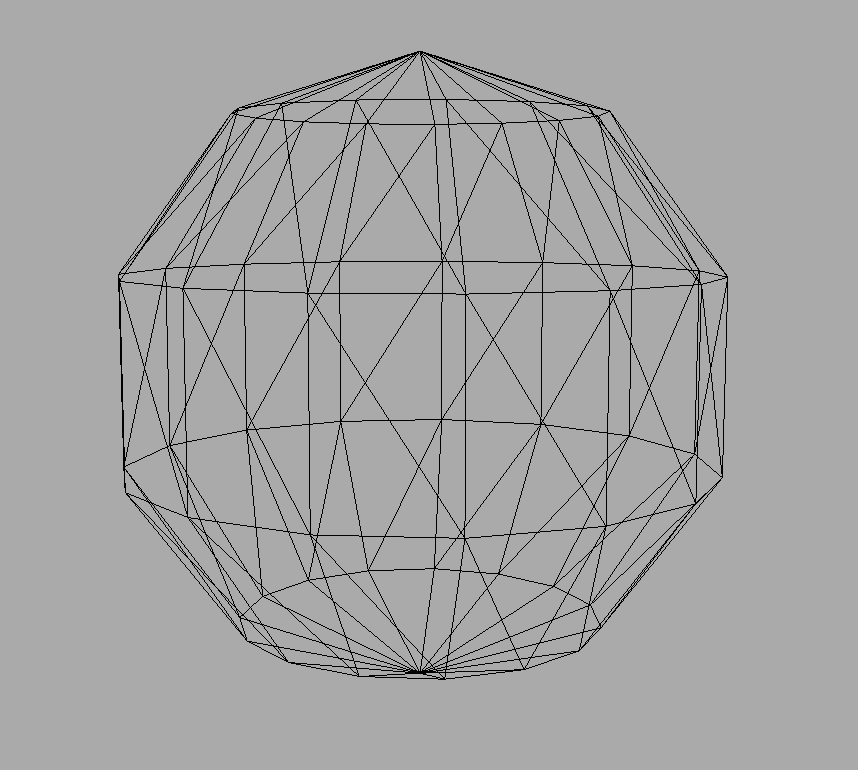
Figure 3. Mesh of a sphere with 15 width segments and 5 height segments.
Mesh backbones can then be decorated with ‘materials’ that have colour and other properties such as emission, roughness, metalness, opacity etc. They can also be decorated with image and other ‘textures’.
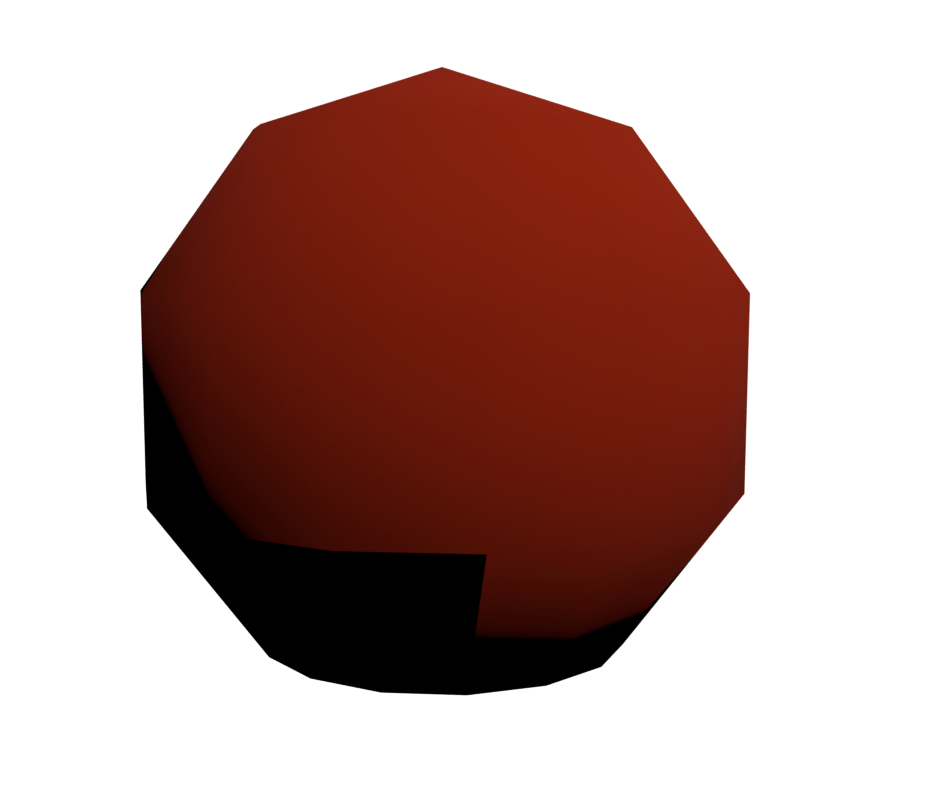
Figure 4. The sphere with a standard material and red colour. A directional light is used.
A sphere ‘geometry’ is made with a size (in this case 0.04 m), number of width and height segments. If you increase the number of width or height segments you will get rounder spheres. The geometry is reused for 9 different sphere meshes. Each sphere mesh gets a material with a colour. We are using the standard material. There are alternatives that can be used and it is important to note that some material types are more dependent on lights than others.
The colours are set in the parameters list. We want to colour the jars by how they were made. Some communities used coils, while others used moulding and the ‘paddle and anvil’ method. The spheres we are creating now will form part of the key that lets the viewer know how the pots were made, by having them in a parameter list, we can just change the hex code and the key and pots will all change. Start with these values and alter them later if you want.
For each sphere we also set its position in x, y, z order.
After:
// Variables
Add:
    	let ratio = 2;
	let desk = 0.8; // desk height
    	let gheight = desk + 0.55; //panel height
	let psize = 1.0; // panel dimensions
and within the init function, after:
scene.add( light );
Add:
	const parameters = {
		materialColor: '#9c5315',
		ringTopColor: '#19ffE7',
		coilColor: '#ff0000',
		paddleColor: '#1e2f97',
		coilBeatenColor: '#e8e337',
		paddleAddColor: '#a61ef4',
		wangelaColor: '#BEBEBE',
		amphColor: '#fc9483',
		nabColor: '#209F00'
    	}
    //spheres for key
	const sphere = new THREE.SphereGeometry( 0.04, 15, 5); //radius, width segments, height segments

	const sphere1 = new THREE.Mesh( sphere,  new THREE.MeshStandardMaterial( {color: parameters.materialColor }));
	sphere1.position.set( 0.84, gheight + (psize *.30), -.75);

	const sphere2 = new THREE.Mesh( sphere,  new THREE.MeshStandardMaterial( {color: parameters.coilColor }));
	sphere2.position.set( 0.84, gheight + (psize *.21), -.75);

	const sphere3 = new THREE.Mesh( sphere,  new THREE.MeshStandardMaterial( {color: parameters.wangelaColor }));
	sphere3.position.set( 0.84, gheight - (psize *.15), -.75);

	const sphere4 = new THREE.Mesh( sphere,  new THREE.MeshStandardMaterial( {color: parameters.nabColor }));
	sphere4.position.set( 0.84, gheight - (psize *.06), -.75);

	const sphere5 = new THREE.Mesh( sphere,  new THREE.MeshStandardMaterial( {color: parameters.paddleAddColor}));
	sphere5.position.set( 0.84, gheight - (psize *.35), -.75);

	const sphere6 = new THREE.Mesh( sphere,  new THREE.MeshStandardMaterial( {color: parameters.coilBeatenColor}));
	sphere6.position.set( 0.84, gheight + (psize *.03), -.75);

	const sphere7 = new THREE.Mesh( sphere,  new THREE.MeshStandardMaterial( {color: parameters.amphColor }));
	sphere7.position.set( 0.84, gheight - (psize *.44), -.75);

	const sphere8 = new THREE.Mesh( sphere,  new THREE.MeshStandardMaterial( {color: parameters.paddleColor}));
	sphere8.position.set( 0.84, gheight - (psize *.25), -.75);

	const sphere9 = new THREE.Mesh( sphere,  new THREE.MeshStandardMaterial( {color: parameters.ringTopColor}));
	sphere9.position.set( 0.84, gheight + (psize *.12), -.75);

	scene.add( sphere1, sphere2, sphere3, sphere4, sphere5, sphere6, sphere7, sphere8, sphere9 );
Save and reload in the browser.
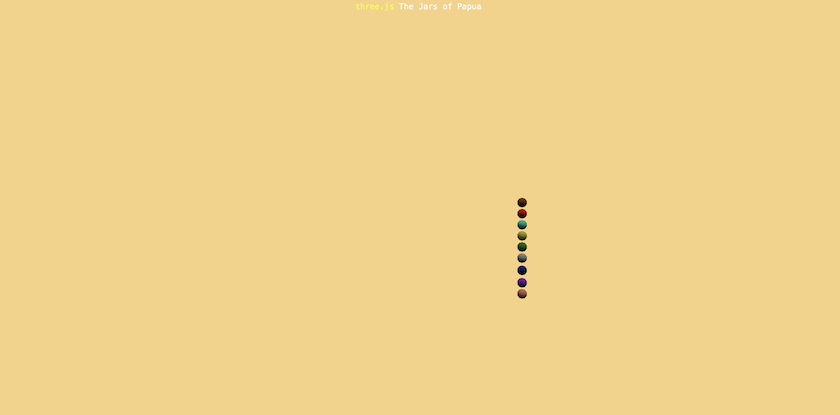
Figure 5. Webpage with nine differently coloured spheres.
Adding the Information Panels and Map
Now we will add some planes. We want the information panels to face the camera, and the default planes do this. However, we want a plane for the map for the jars to sit on, so this plane has to be rotated 90 degrees (- Math.PI /2) around the x axis.
We will give the planes image ‘textures’. Download the /textures folder from this lesson’s /assets folder and place it in the myscene folder. These textures are jpeg and png files and they all have pixels dimensions of 2n by 2n, eg 4096 × 2048. This helps with efficient rendering. Large image files will take longer to load and may not load at all. The use of images with text (created and exported from any graphics program such as Affinity Designer or PowerPoint) is one way to show text. Here we will create all the information panels for all the jars but hide them (by making .visible = false) until the relevant jar is selected by the user. We will have a variable ‘selectedPlane’ to track which panel is showing and at the start an instruction panel will be selected. Some panels will be declared within the init function, but we only do this for panels or objects that will never change.
Textures need to be loaded by a ‘TextureLoader’.
After:
// Variables
Add:
    	let gallery, adzeraG, aibomG, mailuG, dimiriG, louisadeG, yabobG;
	let selectedPlane;
and within the init function, after:
camera.position.set( 0, 1.6, 3 );
add:
const textureLoader = new THREE.TextureLoader()

const introTexture = textureLoader.load( 'textures/Intro.jpg' );
const refTexture = textureLoader.load( 'textures/sources.jpg' );
const keyTexture = textureLoader.load( 'textures/key.jpg' );
const adzeraTexture = textureLoader.load( 'textures/Adzera.jpg' );
const aibomTexture = textureLoader.load( 'textures/Aibom.jpg' );
const mailuTexture = textureLoader.load( 'textures/Mailu.jpg' );
const dimiriTexture = textureLoader.load( 'textures/Dimiri.jpg' );
const louisadeTexture = textureLoader.load( 'textures/Louisade.jpg' );
const yabobTexture = textureLoader.load( 'textures/Yabob.jpg' );

gallery = new THREE.Mesh( new THREE.PlaneGeometry( psize, psize  ), new THREE.MeshBasicMaterial({ map: introTexture }));
gallery.position.set( 0, gheight, -.75);
selectedPlane = gallery;
const gallery2 = new THREE.Mesh(new THREE.PlaneGeometry( psize, psize ), new THREE.MeshBasicMaterial({ map: keyTexture }));
gallery2.position.set( 1.25, gheight, -.75);
const gallery3 = new THREE.Mesh(new THREE.PlaneGeometry(psize, psize  ), new THREE.MeshBasicMaterial({ map: refTexture }));
gallery3.position.set( -1.25, gheight, -.75);

scene.add( gallery, gallery2, gallery3);

adzeraG = new THREE.Mesh( new THREE.PlaneGeometry( psize, psize  ), new THREE.MeshBasicMaterial({ map: adzeraTexture }));
adzeraG.position.set( 0, gheight, -.75);

aibomG = new THREE.Mesh( new THREE.PlaneGeometry( psize, psize  ), new THREE.MeshBasicMaterial({ map: aibomTexture }));
aibomG.position.set( 0, gheight, -.75);

mailuG = new THREE.Mesh( new THREE.PlaneGeometry( psize, psize  ), new THREE.MeshBasicMaterial({ map: mailuTexture }));
mailuG.position.set( 0, gheight, -.75);

dimiriG = new THREE.Mesh( new THREE.PlaneGeometry( psize, psize  ), new THREE.MeshBasicMaterial({ map: dimiriTexture }));
dimiriG.position.set( 0, gheight, -.75);

louisadeG = new THREE.Mesh( new THREE.PlaneGeometry( psize, psize  ), new THREE.MeshBasicMaterial({ map: louisadeTexture }));
louisadeG.position.set( 0, gheight, -.75);

yabobG = new THREE.Mesh( new THREE.PlaneGeometry( psize, psize ), new THREE.MeshBasicMaterial({ map: yabobTexture }));
yabobG.position.set( 0, gheight, -.75);

scene.add( adzeraG, aibomG, mailuG, dimiriG, louisadeG, yabobG);
adzeraG.visible = false;
aibomG.visible = false;
mailuG.visible = false;
dimiriG.visible = false;
louisadeG.visible = false;
yabobG.visible = false;

//the Map
const mapGeometry = new THREE.PlaneGeometry( 3.0 * ratio, 1.5 * ratio );
const mapTexture = textureLoader.load('textures/png.png'); //from google maps
mapTexture.generateMipmaps = true //saves gpu if false
const theMap = new THREE.Mesh( mapGeometry, new THREE.MeshBasicMaterial({ map: mapTexture }));
theMap.rotation.x = - Math.PI / 2;
theMap.position.set( 0, desk, 0); //desk
scene.add( theMap);
Save and reload. If the panels are black, the images are probably in the wrong place.
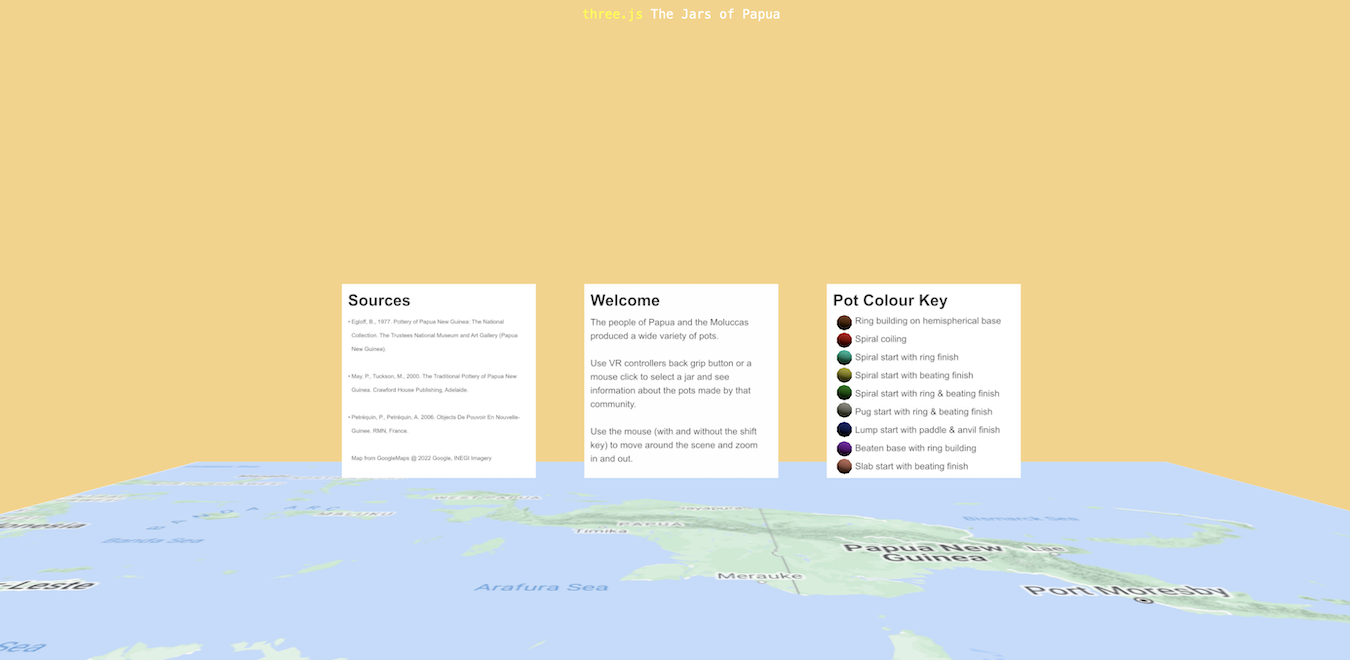
Figure 6. Webpage with three vertical information panels and a horizontal map.
Adding the Jar Models
Three.js can load many different types of models. However, the size is very important and large models will not load. The less nodes or faces in the mesh the smaller the model size. Reducing the nodes or faces in a model, or retopology can be done in programs such as Blender. In Blender this is relatively easy, if the model is imported as a STL and if the model does not have an image texture. These models were primarily designed in Blender and reduced to under 700KB. They were exported as draco compressed glTF (GL Transmission Format) files.
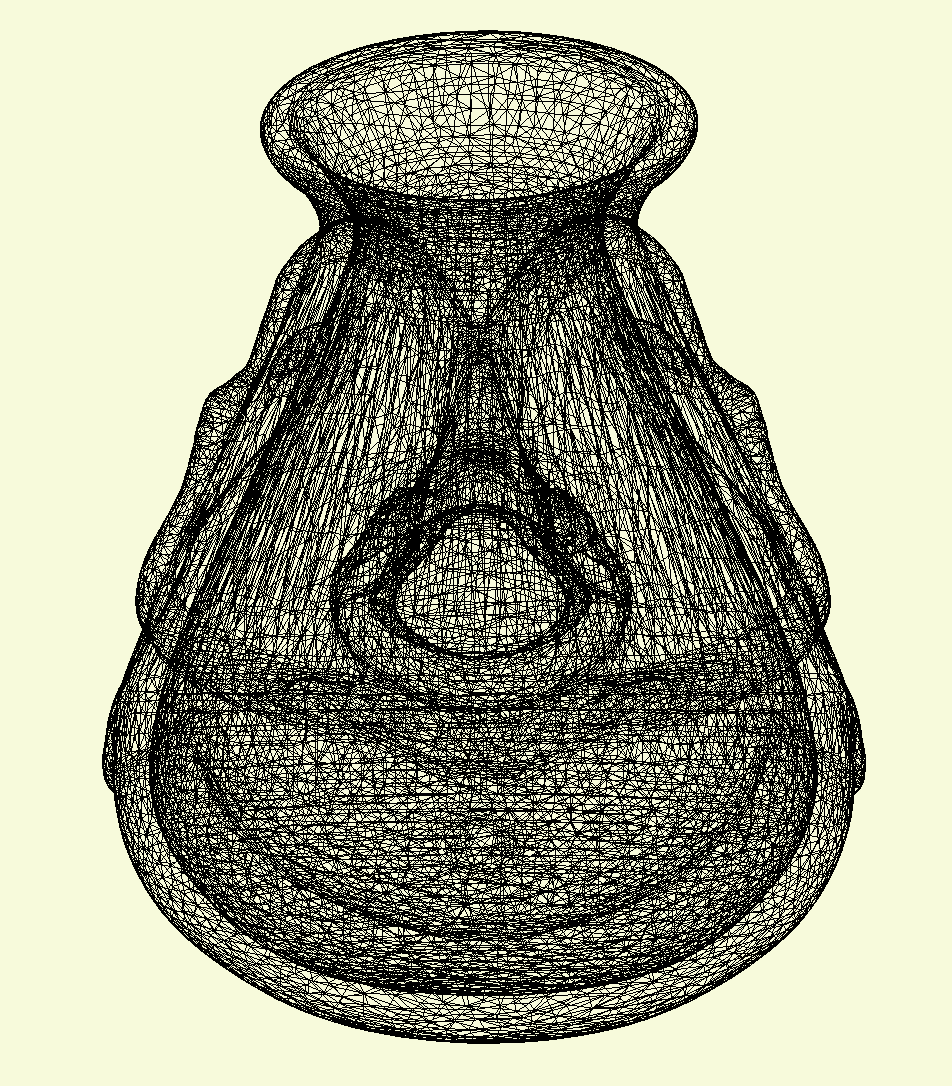
Figure 7. Mesh of the Iatmul jar.
As with the spheres, the jars will get a standard material with a colour.
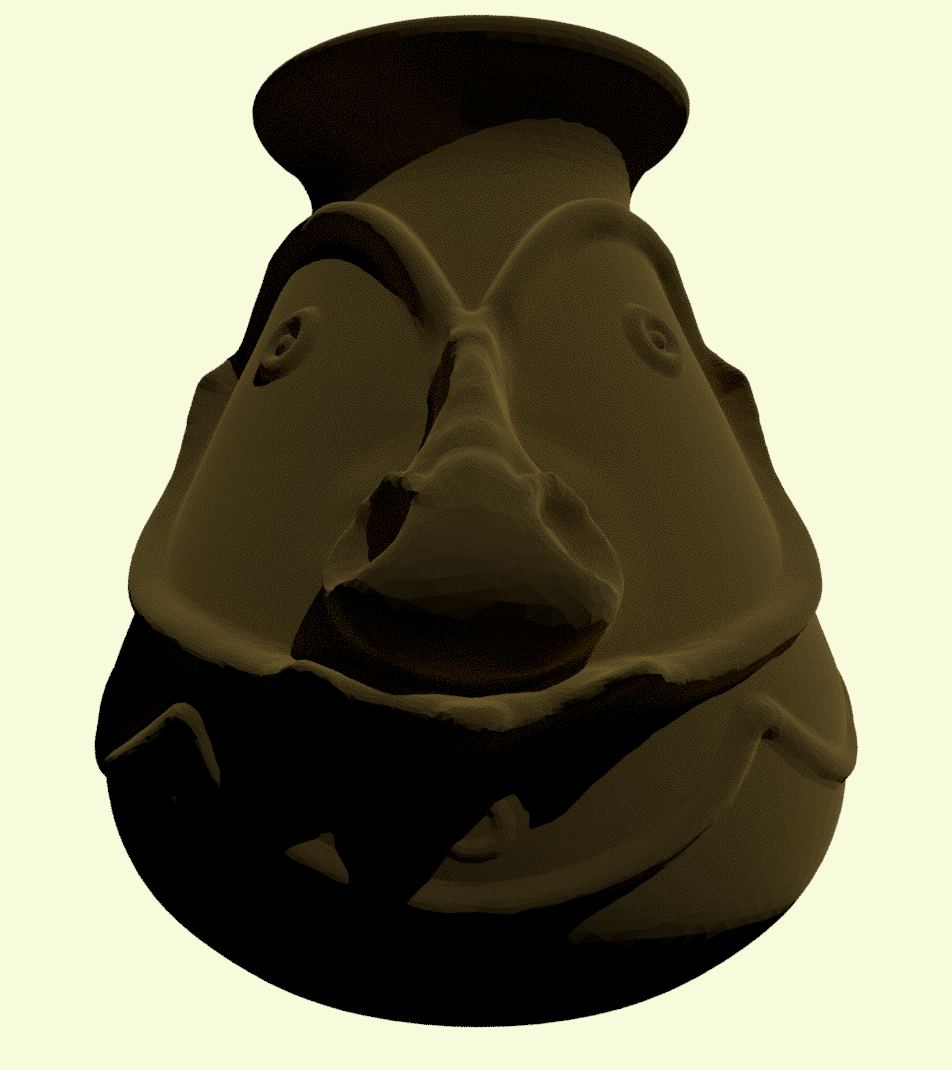
Figure 8. The Iatmul jar with a solid brown colour.
We will later change the emissive property of the material to show if a jar is selected.
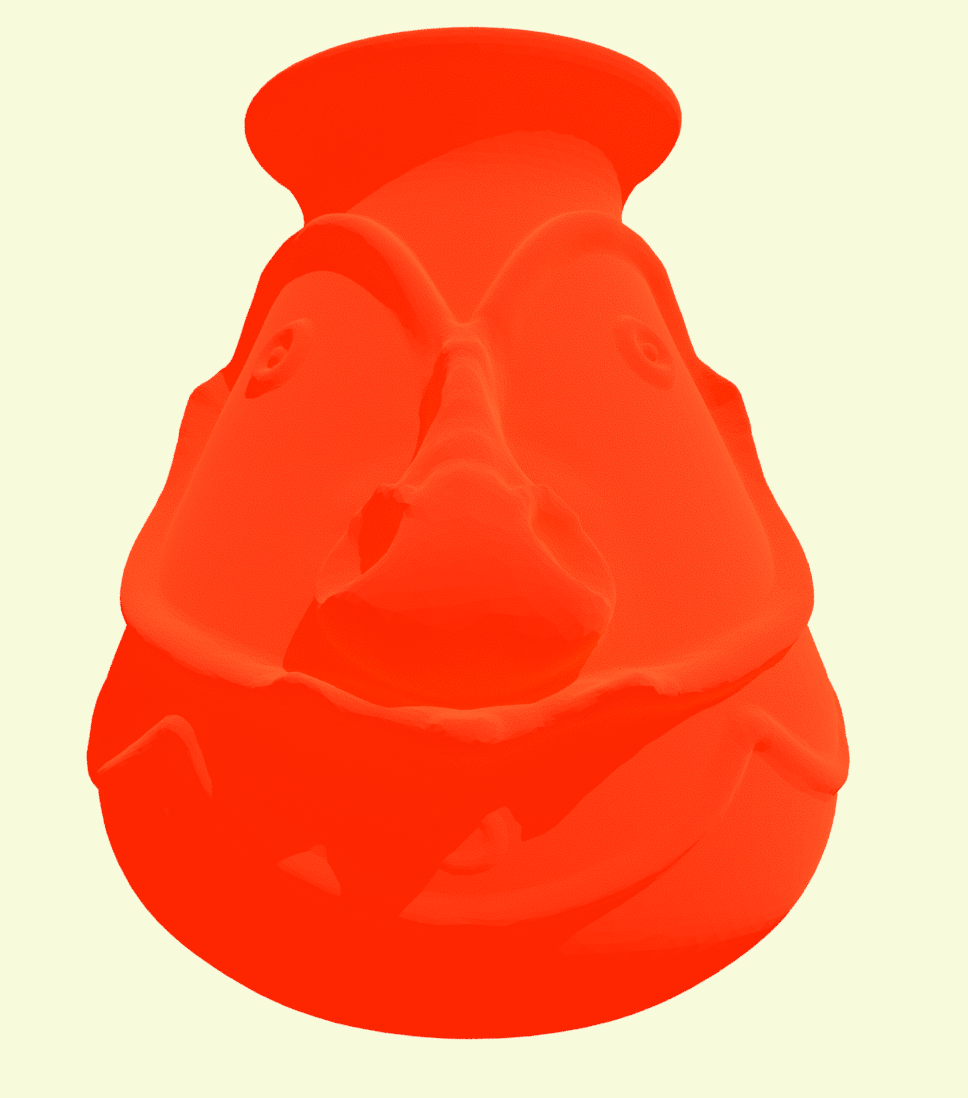
Figure 9. The Iatmul jar with red emission.
Draco-compressed GTLF files are one of the most memory efficient formats to use with three.js. They can also contain image textures for the model and many other features, but we will not use that here. However, they require the importation of additional loaders. It is also possible to have multiple models in one GTLF file and to separate them once imported.
Download the /models folder from this lesson’s /assets folder and put it in the myscene folder.
The jars will be added to a group (called ‘jars’) and the group will be added to the scene. This will allow us to specify later, that objects belonging to the jars group can be selected.
Each jar will get a userdata property that will hold the information panel that is associated with it, so that when it is selected that panel can be shown. Note that the introduction of the ‘piecescale’ variable is not strictly necessary as it is set to the same as the ratio, but it can be changed later to be smaller or larger to alter the relative size of the jars to the map.
Model loading will be written in 3 different ways. All these ways are actually the same, but with different degrees of code condension. To begin with we will add one model, aibomM. A function is defined ‘onLoadAibom’ that takes the .glb and loads it when called by the loader load function. The program will not stop while loading the file which can take a while so to avoid problems do not try to add the model to a group outside the loading function.
After:
import * as THREE from 'three';
add:
import { GLTFLoader } from 'three/addons/loaders/GLTFLoader.js';
import { DRACOLoader } from 'three/addons/loaders/DRACOLoader.js';
After:
// Variables
add:
	const loader = new GLTFLoader();
	const dracoLoader = new DRACOLoader();
	dracoLoader.setDecoderPath( 'https://unpkg.com/three@0.160.0/examples/jsm/libs/draco/' );
	loader.setDRACOLoader( dracoLoader );

	let jars;
	let adzeraM, aibomM, mailuM, louisadeM, dimiriM, yabobM;
Within the init function after:
scene.add( sphere1, sphere2, sphere3, sphere4, sphere5, sphere6, sphere7, sphere8, sphere9 );
add:
	jars = new THREE.Group();
	scene.add( jars );
	let piecescale = ratio;

	// verbose version
	function onLoadAibom( gltf ) {
		aibomM = gltf.scene.children[0];
		aibomM.material = new THREE.MeshStandardMaterial();
		aibomM.position.set( 0.36* ratio, desk + 0.01,-0.01* ratio);
		aibomM.scale.set( piecescale, piecescale, piecescale);
		aibomM.material.color.set(parameters.materialColor);
		aibomM.userData.planes = aibomG;
		jars.add( aibomM);
	}
	loader.load( 'models/gltf/aibom.glb', onLoadAibom, undefined, function ( error ) {console.error( error );} );
Save and reload and you should see a model.
To avoid repetitive code we will define a function createModel(), and have the loader run this function when it loads the model. The function will take 4 arguments: the x position, the z position, the model colour and the matching gallery as these vary with the different models.
Replace
	// most verbose
	function onLoadAibom( gltf ) {
	...
	}
	loader.load( 'models/gltf/aibom.glb', onLoadAibom, undefined, function ( error ) {console.error( error );} );
with
	//a function to make the model with the parameter specified
	function createModel(gltf, x, z, col, gallery){
		const model = gltf.scene.children[0];
		model.material = new THREE.MeshStandardMaterial();
		model.position.set( x * ratio, desk + 0.01, z * ratio);
		model.scale.set( piecescale, piecescale, piecescale);
		model.material.color.set(col);
		model.userData.planes = gallery;
		return model;
	}

	//calls the createModel funtion but still in a separately defined function
	function onLoadAibom( gltf ) {
		aibomM = createModel(gltf, 0.36, -0.01, parameters.materialColor, aibomG);
		jars.add( aibomM);
	}
	loader.load( 'models/gltf/aibom.glb', onLoadAibom, undefined, function ( error ) {console.error( error );} );
Save and check the model still appears. The code can be condensed further by using ‘anonymous’ functions, i.e. the function called is not named. It does not matter which method you use if you are writing your own code.
Replace
	//calls the createModel funtion but still in a separately defined function
	function onLoadAibom( gltf ) {
	...
	}
	loader.load( 'models/gltf/aibom.glb', onLoadAibom, undefined, function ( error ) {console.error( error );} );
with
	// directly has the onLoad function as an anonymous function in the loader.load
	loader.load( 'models/gltf/aibom.glb', function( gltf ) {
		aibomM = createModel(gltf, 0.36, -0.01, parameters.materialColor, aibomG);
		jars.add( aibomM);
	}, undefined, function ( error ) {console.error( error );} );

	loader.load( 'models/gltf/mailu.glb', function( gltf) {
		mailuM = createModel(gltf, 0.84, 0.48, parameters.nabColor, mailuG);
		jars.add( mailuM);
	}, undefined, function ( error ) { console.error( error );} );

	loader.load( 'models/gltf/louisade.glb', function( gltf ) {
		louisadeM = createModel(gltf, 0.99, 0.59, parameters.ringTopColor, louisadeG);
		jars.add(louisadeM);
	}, undefined, function ( error ) {console.error( error );} );

	loader.load( 'models/gltf/adzera.glb', function( gltf ) {
		adzeraM = createModel(gltf, 0.61, 0.15, parameters.coilBeatenColor, adzeraG);
		jars.add( adzeraM);
	}, undefined, function ( error ) {console.error( error );} );

	loader.load( 'models/gltf/dimiri.glb', function( gltf ) {
		dimiriM = createModel(gltf, 0.43, 0, parameters.coilColor, dimiriG);
		jars.add( dimiriM);
	}, undefined, function ( error ) {console.error( error );} );

	loader.load( 'models/gltf/yabob.glb', function( gltf ) {
		yabobM = createModel(gltf, 0.572, 0.0396, parameters.paddleColor, yabobG);
		jars.add( yabobM);
	}, undefined, function ( error ) {console.error( error );} );
Save and reload and you should see 5 models. Number 6 is out of camera view.
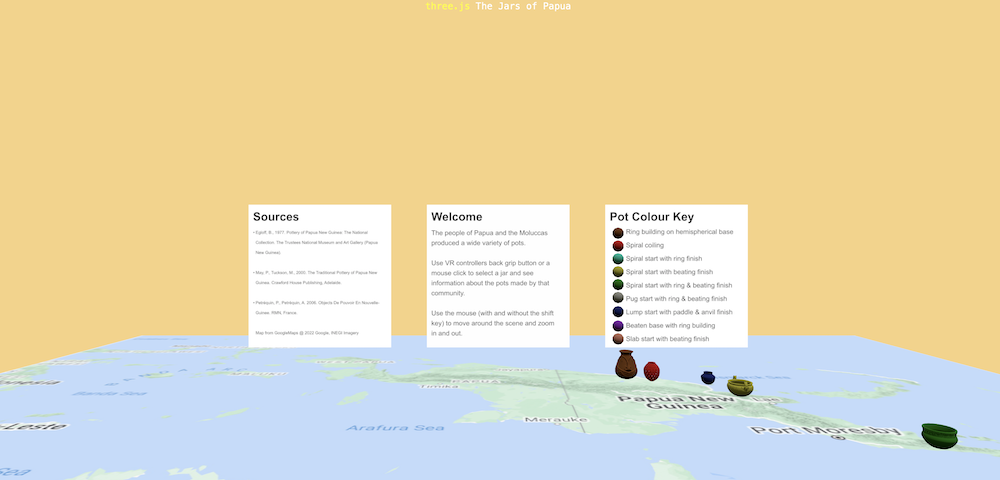
Figure 10. Webpage with six jars from Papua, but one is out of camera range.
Note that if you change ‘let piecescale = ratio;’ to ‘let piecescale = ratio*2;’ the vessels become bigger, but some will overlap.
You can calculate where to set the positions of the jars by taking into account the map dimensions.
Adding Camera Controls to Move Around
We can add mouse controls to allow us to move around the scene. Some controls, including orbit, map, fly, pointer lock and trackball change the position of the camera. Others such as drag and transform can alter the position of objects. We need to import any controls. We will first use ‘orbit’ controls that allow the user to navigate the scene with rotation (when the mouse is clicked and dragged), panning (when the mouse is clicked and dragged while pressing the shift key) or zooming (with mouse scrolling).
After
import { DRACOLoader } from 'three/addons/loaders/DRACOLoader.js';
add:
import { OrbitControls } from 'three/addons/controls/OrbitControls.js';
Change:
let container, camera, scene, renderer; //declare the variables
to:
let container, camera, scene, renderer, controls;
In the init, after:
container.appendChild( renderer.domElement );
add:
	controls = new OrbitControls( camera, renderer.domElement);
	controls.target.set( 0, 1.6, 0 );
	controls.update();
If you save and reload you should be able to move around and zoom in and out.
Adding Jar Selection
Next we want to add an event listener, to be able to select a jar and change the information panel.
After:
// Variables
add:
let raycasterM, pointer, selectedTorus; // for mouse controls
Within the init function definition, after:
controls.update();
add:
	raycasterM = new THREE.Raycaster();
    	pointer = new THREE.Vector2();
	selectedTorus = new THREE.Mesh( new THREE.TorusGeometry( 0.015, 0.007, 20, 20  ), new THREE.MeshStandardMaterial({color: 0x006400}));

	window.addEventListener( 'click', onClick );
Then we have to tell the listener what do do if there is a click in the window. We want to: make sure it does not use the orbit controls; take the click position and send a ray to the click position (from the camera) and see if any jars are there. If it finds any jars, it will unhighlight the last jar selected and hide that panel, it will then highlight (by making red emissive) the chosen jar, and make visible the panel that is linked to it in the userData. After the resize listener:
	function onWindowResize() {
		...
	}
add:
	function onClick( event ) {
		event.preventDefault(); //stops the orbiting
		pointer.x = event.clientX / window.innerWidth * 2 - 1
		pointer.y = - (event.clientY / window.innerHeight) * 2 + 1
		raycasterM.setFromCamera( pointer, camera );
		const intersects = raycasterM.intersectObjects( jars.children);

		if(intersects.length > 0){
			selectedTorus.material.emissive.r = 0;
			const found = intersects[ 0 ].object;
			selectedTorus = found;
			found.material.emissive.r = 1;
			selectedPlane.visible = false;
			selectedPlane = found.userData.planes;
			selectedPlane.visible = true;
		}
	}
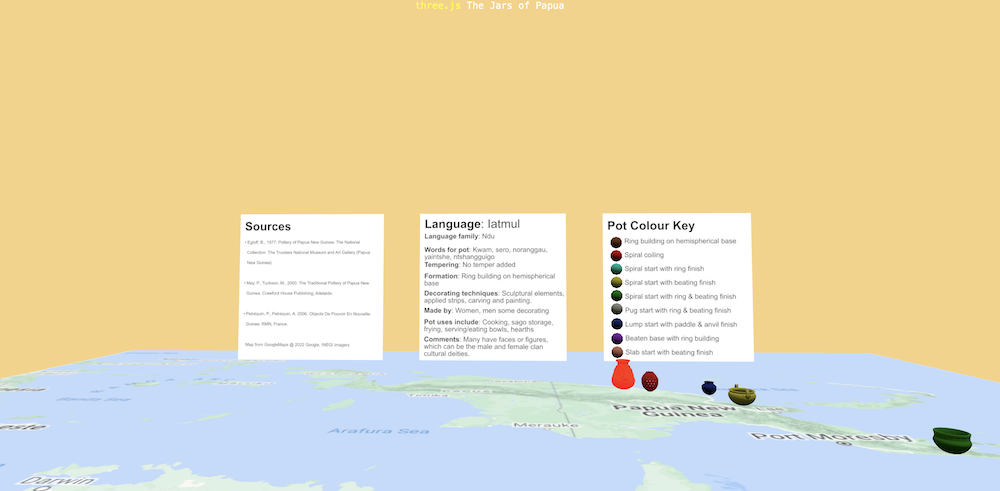
Figure 11. Webpage showing the Iatmul jar selected with its red emission set to true, and the Iatmul information panel showing.
The next sections are optional. You can turn the website into a puzzle game or add extra jars.
Designing a Game
When designing a game or puzzle, plan and sketch the layout. Consider if the puzzle is based on memory or logic. Consider consulting guides such as Schell (2015).
To transform the scene into a puzzle the information panel used needs to be altered, as it is the main source of user information.
The goal for the user of this game is to start with the jars off the map and the PNG communities marked by selectable tokens. When the communities are selected (mouse click) the information panel will provide the information on the pots made by that community. Information on how the technique used to make the pot can be used to work out which of the jars may be a match, as the jars are coloured by the technique and a key is provided. The decoration technique may also serve as a guide. The user can move the jars (mouse). If they place the matching jar on the community marker then the jar becomes unmoveable and the background colour changes.
Adding Tori
Green tori will be used to mark the communities. They can be harder to aim for than discs, but most PNG communities use tori made of leaves to hold the vessels as they are being made. The torus is a basic three.js geometry, and the diameter, central hole size, and segmentation can be specified. However, tori are generated at the wrong angle for this game and need to be rotated (around the x axis) by 90 degrees (i.e. -Math.PI *1/2).
Because each torus is connected to a different information planel, they still need to be created separately and added to a torus group. The mouse click event listener has to be altered so that it targets the torus group instead of the jar group.
While each site COULD be added with code such as:
	const aibomSite = new THREE.Mesh( new THREE.TorusGeometry( 0.015, 0.007, 20, 20 ), new THREE.MeshStandardMaterial({color: 0x006400}));
	aibomSite.position.set(0.36* ratio, desk + 0.01, -0.01* ratio);
	aibomSite.scale.set( piecescale, piecescale, piecescale);
	aibomSite.rotation.x = -Math.PI * 1/2;
	aibomSite.userData.planes = aibomG;
it is also possible to make a function that takes position (x and z) co-ordinates and the relevant gallery. The function is then called for each site.
In the index.html file REPLACE
let jars;
with
let jars, torus;
In the init function after
let piecescale = ratio;
add
	torus = new THREE.Group();
	scene.add( torus );

	//a function to make the site with the parameter specified
	function createSite(x, z, gallery){
		const model = new THREE.Mesh( new THREE.TorusGeometry( 0.015, 0.007, 20, 20 ), new THREE.MeshStandardMaterial({color: 0x006400}));
		model.position.set( x * ratio, desk + 0.01, z * ratio);
		model.scale.set( piecescale, piecescale, piecescale);
		model.rotation.x = -Math.PI * 1/2;
		model.userData.planes = gallery;
		return model;
	}

	const aibomSite = createSite(0.36, -0.01, aibomG);

	const dimiriSite = createSite(0.43, 0, dimiriG);

	const louisadeSite = createSite(0.99, 0.59, louisadeG);

	const mailuSite = createSite(0.84, 0.48, mailuG);

	const adzeraSite = createSite(0.61, 0.15, adzeraG);

	const yabobSite = createSite(0.572, 0.0396, yabobG);

	torus.add(aibomSite, mailuSite, dimiriSite, louisadeSite, adzeraSite, yabobSite);

	selectedTorus = aibomSite;
save and check the tori appear on site reload.
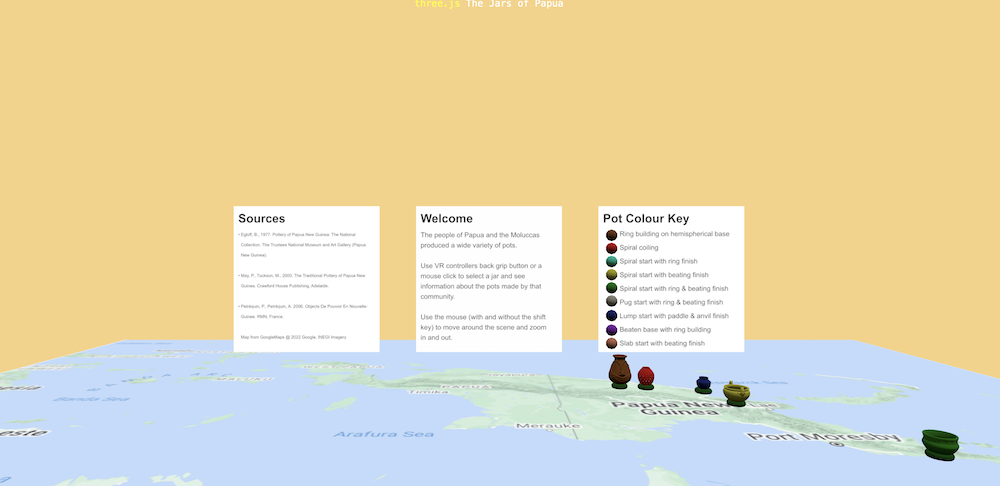
Figure 12. Webpage with the jars sitting on tori.
in the onClick(event) function change:
const intersects = raycasterM.intersectObjects( jars.children);
to:
const intersects = raycasterM.intersectObjects( torus.children);
save and check the mouse click and panel change now works on tori and not the jars.
Enabling Jar Movement
To be able to move the jars using the mouse, DragControls have to be imported and created.
After:
import { OrbitControls } from 'three/addons/controls/OrbitControls.js';
add:
import { DragControls } from 'three/addons/controls/DragControls.js';
change:
let container, camera, scene, renderer, controls;
to:
let container, camera, scene, renderer, controls, dragControls;
in the init function after:
controls.update();
add:
	dragControls = new DragControls( [ jars ], camera, renderer.domElement );
	dragControls.addEventListener('dragstart', function (event) {
		controls.enabled = false
	})
	dragControls.addEventListener('dragend', function (event) {
        	controls.enabled = true
	})
save and reload and check that you can now move the jars around. However, you will see that it can be difficult to move jars in certain positions in 3D. It is easier to achieve if you view the scene directly from the top or directly from the side.
Start Jars at Random Positions
To make the jars start in a random position above the map, change the position.set to x = Math.random() - 1, y = 1.2, and z = Math.random() * 0.5 - 0.3. Math.random() generates a number between 0 and 1 so all jars will be at the same height but in a random spot within 1m wide and within a 0.5m depth. Store the true location in a userData variable. Before you do this you may want to note, or take a screenshot of where at least one of the jars should go.
replace:
	function createModel(gltf, x, z, col, gallery){
		...
	}
			...

	loader.load( 'models/gltf/yabob.glb', function( gltf ) {
		...
	}, undefined, function ( error ) {console.error( error );} );
with:
	function createModel(gltf, col, site){
		const model = gltf.scene.children[0];
		model.material = new THREE.MeshStandardMaterial();
		model.position.set( Math.random() - 1, 1.2, Math.random() * 0.5 - 0.3 );
		model.scale.set( piecescale, piecescale, piecescale);
		model.material.color.set(col);
		model.userData.site = site;
		return model;
	}
	// directly has the onLoad function as an anonymous function in the loader.load
	loader.load( 'models/gltf/aibom.glb', function( gltf ) {
		aibomM = createModel(gltf, parameters.materialColor, aibomSite);
		jars.add( aibomM);
	}, undefined, function ( error ) {console.error( error );} );

	loader.load( 'models/gltf/mailu.glb', function( gltf) {
		mailuM = createModel(gltf, parameters.nabColor, mailuSite);
		jars.add( mailuM);
	}, undefined, function ( error ) { console.error( error );} );

	loader.load( 'models/gltf/louisade.glb', function( gltf ) {
		louisadeM = createModel(gltf, parameters.ringTopColor, louisadeSite);
		jars.add(louisadeM);
	}, undefined, function ( error ) {console.error( error );} );

	loader.load( 'models/gltf/adzera.glb', function( gltf ) {
		adzeraM = createModel(gltf, parameters.coilBeatenColor, adzeraSite);
		jars.add( adzeraM);
	}, undefined, function ( error ) {console.error( error );} );

	loader.load( 'models/gltf/dimiri.glb', function( gltf ) {
		dimiriM = createModel(gltf, parameters.coilColor, dimiriSite);
		jars.add( dimiriM);
	}, undefined, function ( error ) {console.error( error );} );

	loader.load( 'models/gltf/yabob.glb', function( gltf ) {
		yabobM = createModel(gltf, parameters.paddleColor, yabobSite);
		jars.add( yabobM);
	}, undefined, function ( error ) {console.error( error );} );
Save and reload, you should see the jars starting above the map and if you reload, they will be in different random positions.
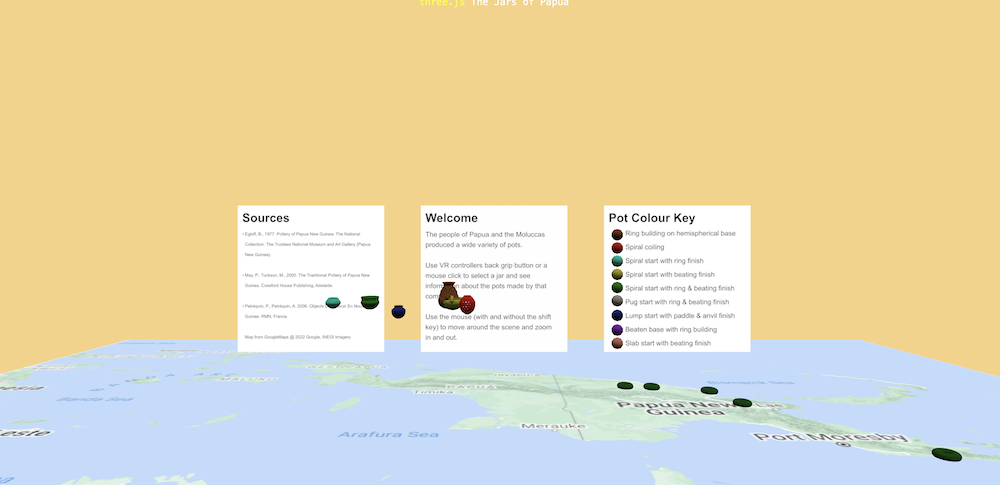
Figure 13. Webpage with the jars at random start positions above the map.
Check for Successful Matches
At the end of each jar movement, you want to check if the jar was moved to the correct spot. One way to do this is to determine the distance between the jar and the matching site (torus). You need to set an allowed distance difference that will allow for non-exact placement, but will not be successful if a jar is placed on a torus nearby, here we will use 5 cm (2.5cm * ratio).
If the test is successful, there has to be a signal to the user. Here we will change the background colour to a random colour, and make the jar unmoveable (and rotate it to be upright). No signal will be given for an incorrect match. We will create an additional group called ‘unmoveable’ and attach any jars that are placed close enough to their torus to that group. Objects can only be attached to one group, so when a model is moved to ‘unmoveable’ it will no longer be in ‘jars’ and so the mouse will not detect it.
Change
let jars, torus;
to
let jars, torus, unmoveable;
let truesite = null;
let selectedObject = null;
within the init function, after:
scene.add( jars );
add
	unmoveable = new THREE.Group();
	scene.add(unmoveable);
For the mouse controls, change
dragControls.addEventListener('dragend', function (event) {
        	...
})
to
dragControls.addEventListener('dragend', function (event) {
    	controls.enabled = true;
		selectedObject = event.object;
		truesite = selectedObject.userData.site;
		let testposition = new THREE.Vector3(0,0,0); //needs to be something first
		truesite.getWorldPosition( testposition ); //a Vector3 (x,y,z)
		let aposition = selectedObject.position; //way 1 test object position

		if ( aposition.distanceTo( testposition ) < .025 * ratio) {
			scene.background = new THREE.Color( Math.random() * 0xffffff ); // random
			selectedObject.position.set(testposition.x, testposition.y, testposition.z);
			selectedObject.rotation.set(0, 0, 0);
			unmoveable.attach( selectedObject);
		}
})
You can save and test this. Moving in 3D can be difficult, it is best done in multiple steps viewing from the side to lower the jar to the map and then the top (birds eye view) to place it in the right spot, or vice versa.
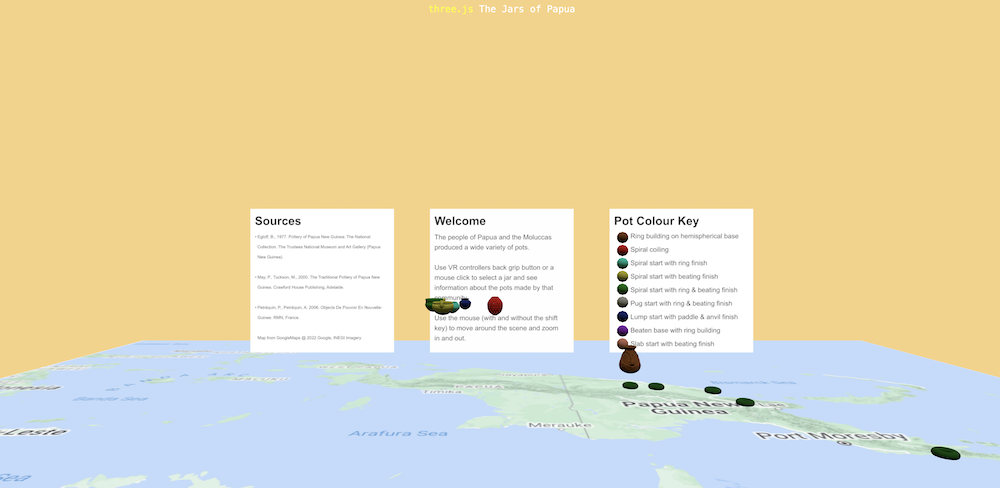
Figure 14. Moving jars, such as the Iatmul jar, close to their tori is best done in multiple steps and best done when viewing the scene directly from the front, side or above.
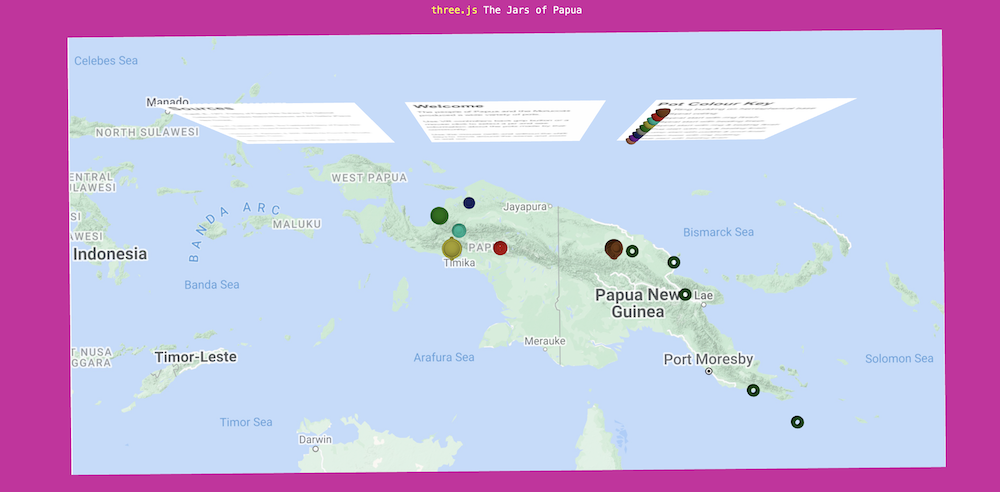
Figure 15. Moving jars while viewing the scene from above helps correctly position jars, triggering a background (random) colour change.
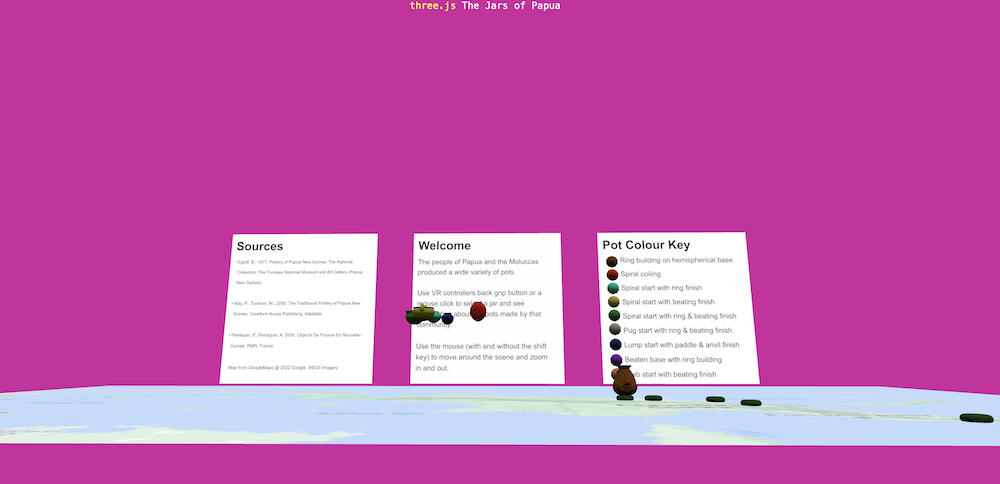
Figure 16. The Iatmul jar in its correct position.
This way of placing the jars on the sites can be frustrating for users and the onClick function is actually called at the end of a drag event, thus you can also alter the onClick function to register a correct match if the drag ends with the mouse on the correct site. This alternative means that the match is tested in 2D space instead of in 3D space (as in the first approach), and thus matches are easier, especially for players not experienced with digital 3D environments. If you develop your own games you might want to test different approaches to see what works best.
Replace
function onClick( event ) {
			...
		}
with
function onClick( event ) {
			event.preventDefault();
			pointer.x = event.clientX / window.innerWidth * 2 - 1
			pointer.y = - (event.clientY / window.innerHeight) * 2 + 1
			raycasterM.setFromCamera( pointer, camera );
			const intersects = raycasterM.intersectObjects( torus.children);
			if(intersects.length > 0){
				selectedTorus.material.emissive.r = 0;
				const found = intersects[ 0 ].object;
				if(found == truesite){
					scene.background = new THREE.Color( Math.random() * 0xffffff ); // random
					let testposition = new THREE.Vector3(0,0,0); //needs to be something first
					truesite.getWorldPosition( testposition ); //a Vector3 (x,y,z)
					selectedObject.position.set(testposition.x, testposition.y, testposition.z);
					selectedObject.rotation.set(0, 0, 0);
					unmoveable.attach( selectedObject );
				}
				selectedTorus = found;
				found.material.emissive.r = 1;
				selectedPlane.visible = false;
				selectedPlane = found.userData.planes;
				selectedPlane.visible = true;
			}
			truesite = null;
		}
Update the Instructions
Lastly, to update the instructions in the first intro panel change the texture to the intro2.jpg. So that
const introTexture = textureLoader.load( 'textures/Intro.jpg' );
becomes
const introTexture = textureLoader.load( 'textures/Intro2.jpg' );
save and check the new instructions appear.
Adding Additional Jars
Pots were made in many different forms by different communities in PNG and West Papua. There are models and information panels for 29 communities in the folders provided. If you want to experiment with adding them, the following table provides the model name, matching panel, location and colour parameter name to use. Each needs a model name, panel name and a site/torus (game only). These can be called anything (avoid special characters), but remember to declare them.
| Model | Texture | Position | Colour |
|---|---|---|---|
| agarbai.glb | Agarabi.jpg | 0.55 * ratio, desk + 0.01, 0.15 * ratio | coilBeatenColor |
| aloalo.glb | Aloalo.jpg | 0.9* ratio, desk + 0.01, 0.49* ratio | ringTopColor |
| bau.glb | Bau.jpg | 0.535* ratio, desk + 0.01, 0.04* ratio | coilColor |
| meno.glb | Meno.jpg | 0.28* ratio, desk + 0.01, -0.01* ratio | coilColor |
| binadean.glb | Biawaria.jpg | 0.76 * ratio, desk + 0.01, 0.34 * ratio | coilBeatenColor |
| boiken.glb | Boikin.jpg | 0.37* ratio, desk + 0.01, -0.08* ratio | coilColor |
| collingwood.glb | Collingwood.jpg | 0.85* ratio, desk + 0.01, 0.4* ratio | wangelaColor |
| demta.glb | Demta.jpg | 0.13* ratio, desk + 0.01, -0.16* ratio | materialColor |
| guhu.glb | guhu.jpg | 0.65* ratio, desk + 0.01, 0.23* ratio | coilColor |
| huon.glb | Huon.jpg | 0.71* ratio, desk + 0.01, 0.13* ratio | paddleColor |
| ilesales.glb | IleSales.jpg | -0.34* ratio, desk + 0.01, 0.11* ratio | paddleColor |
| kaiep.glb | Kaiep.jpg | 0.41* ratio, desk + 0.01, -0.07* ratio | paddleColor |
| kombio.glb | Kombio.jpg | 0.29* ratio, desk + 0.01, -0.05* ratio | coilColor |
| kwimbu.glb | Abelam.jpg | 0.33* ratio, desk + 0.01, -0.06* ratio | coilColor |
| lumi.glb | Lumi.jpg | 0.25* ratio, desk + 0.01, -0.08* ratio | coilColor |
| maluku.glb | Maluku.jpg | -0.86* ratio, desk + 0.01, -0.08* ratio | paddleAddColor |
| manus.glb | Manus.jpg | 0.66* ratio, desk + 0.01, -0.2* ratio | paddleColor |
| marik.glb | Marik.jpg | 0.575* ratio, desk + 0.01, 0.079* ratio | coilColor |
| moto.glb | Moto.jpg | 0.71* ratio, desk + 0.01, 0.42* ratio | paddleColor |
| pubineri.glb | Pubineri.jpg | 0.28* ratio, desk + 0.01, -0.01* ratio | coilColor |
| triobriand.glb | Triobriand.jpg | 1.01* ratio, desk + 0.01, 0.33* ratio | amphColor |
| tumleo.glb | Tumleo.jpg | 0.27* ratio, desk + 0.01, -0.12* ratio | paddleColor |
| waiGeo.glb | Waigeo.jpg | -0.65* ratio, desk + 0.01, -0.35* ratio | paddleAddColor |
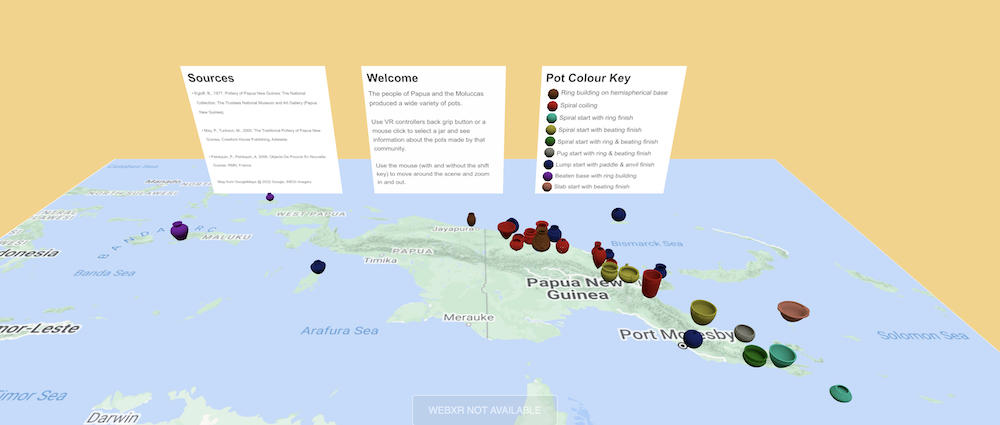
Figure 17. Additional jars can be addded to the scene and puzzle.
Conclusion and Next Steps
This has been an introduction to using three.js and the basic concepts in creating 3D scenes. The official three.js website shows how much more complex pages can be created, with additions such as animations and sound. The three.js site also contains example code that could be used for extending the puzzle created here, with sound effects for correct matches. Many sites, especially those with large models, feature loading bars, that give feedback to the user while the models load. Another possible extension is to enable the scene to be viewed and manipulated in VR.
There are many ways cultural heritage models can be used interactively: vessels can be refitted (Hardy, 2023), site contexts could be toggled on and off, or objects could be virtually analysed (for p-XRF etc). Providing research data in such a format, has challenges, but also has the possibility for making findings more accessible and interesting to non-academic audiences.
References
D’Andrea, A., Conyers, M., Courtney, K.K., Finch, E., Levine, M. Rountrey, A., Kettler, H.S., Webbink, K. 2022. “Copyright and Legal Issues Surrounding 3D Data.” In 3D Data Creation to Curation: Community Standards for 3D Data Preservation, eds. Moore, J., Rountrey, A., Kettler, H.S. Chicago: Association of Research and College Libraries (ALA).
Dolbunova, E., Lucquin, A., McLaughlin, T.R., Bondetti, M., Courel, B., Oras, E., Piezonka, H., Robson, H.K., Talbot, H., Adamczak, K., Andreev, K., Asheichyk, V., Charniauski, M., Czekai-Zastawny, A., Ezepenko, I., Grechkina, T., Gunnarssone, A., Gusentsova, T.M., Haskevych, D., Ivanischeva, M., Kabacinski, J., Karmanov, V, Kosorukova, N., Kostyleva, E., Kriiska, A., Kukawka, S., Lozovskaya, O., Mazurkevich, Z., Nedomolkina, N., Piliciauskas, G., Sinitsyna, G., Skorobogatov, A., Smolyaninov, R.V., Surkov, A., Tkachov, O., Tkachova, Ml, Tsybrij, A., Tsybrij, V., Vybornov, A.A., Wawrusiewicz, A., Yudin, A.I., Meadows, J., Heron, C., Craig O.E. 2023. The Transmission of Pottery Technology Among Prehistoric European Hunter-Gatherers. Nature Human Behaviour. 7:171.
Gaffney, D., Summerhayes, G.R., Ford, A., Scott, J.M., Denham, T., Field, J., Dickinson, W.R. 2015. Earliest Pottery on New Guinea Mainland Reveals Austronesian Influences in Highland Environments 3000 Years Ago. PLoS ONE 10(9):e0134497.
Hardy, K. 2023. The creation of ‘Uvira’s Pot’, a virtual reality puzzle to promote engagement with archaeological research. Conference: Digital Humanities 2023. Collaboration as Opportunity (DH2023) At: Graz, Austria.
Holtorf, C. 2005. From Stonehenge to Las Vegas. Archaeology as popular culture. Walnut Creek: AltaMira Press.
Maschner, H. July 2022 (https://sketchfab.com/blogs/community/cultural-heritage-spotlight-global-digital-heritage/?utm_source=website&utm_campaign=newsfeed)
May, P., Tuckson, M. 2000. The Traditional Pottery of Papua New Guinea. Crawford House Publishing, Adelaide.
O’Brien, M.J., Lyman, R.L., Collard, M., Holdern, C.J., Gray, R.D., Shennan, S.J. 2008. Transmission, Phylogenetics and the Evolution of Cultural Diversity. In: Cultural Transmission and Archaeology: Issues and Case Studies. Society for American Archaeology. Washington.
Oruç, P. 2020 3D Digitisation of Cultural Heritage: Copyright Implications of the Methods, Purposes and Collaboration, 11 JIPITEC 149 para 1.
Pétrequin, A.-M., Pétrequin, P. 2006. Objets de Pouvoir en Nouvelle Guinée: Approche Ethnoarchéologique d’un Système de Signes Sociaux: Catalogue de la Donation Anne-Marie et Pierre Pétrequin. Réunion des Musées Nationaux, Paris.
Schell, J. 2015. The Art of Game Design: A Book of Lenses. CRC Press. FL.